Convert PET to BIDS
This walkthrough takes a folder of Positron Emission Tomography (PET) DICOMs and turns it into a validated, shareable BIDS dataset using PET2BIDS. Unlike most MRI scans, a PET DICOM doesn't carry every detail needed to analyze the data — in particular, the scanner has no record of which tracer was used, so you supply that separately.
Requirements
- Install BIDSvue for Linux, macOS, or Windows.
- Download and extract the sample
pet2bidsDICOMdataset (a single subject, single session). - Roughly 15 minutes and a little free disk space.
Create a new dataset from PET
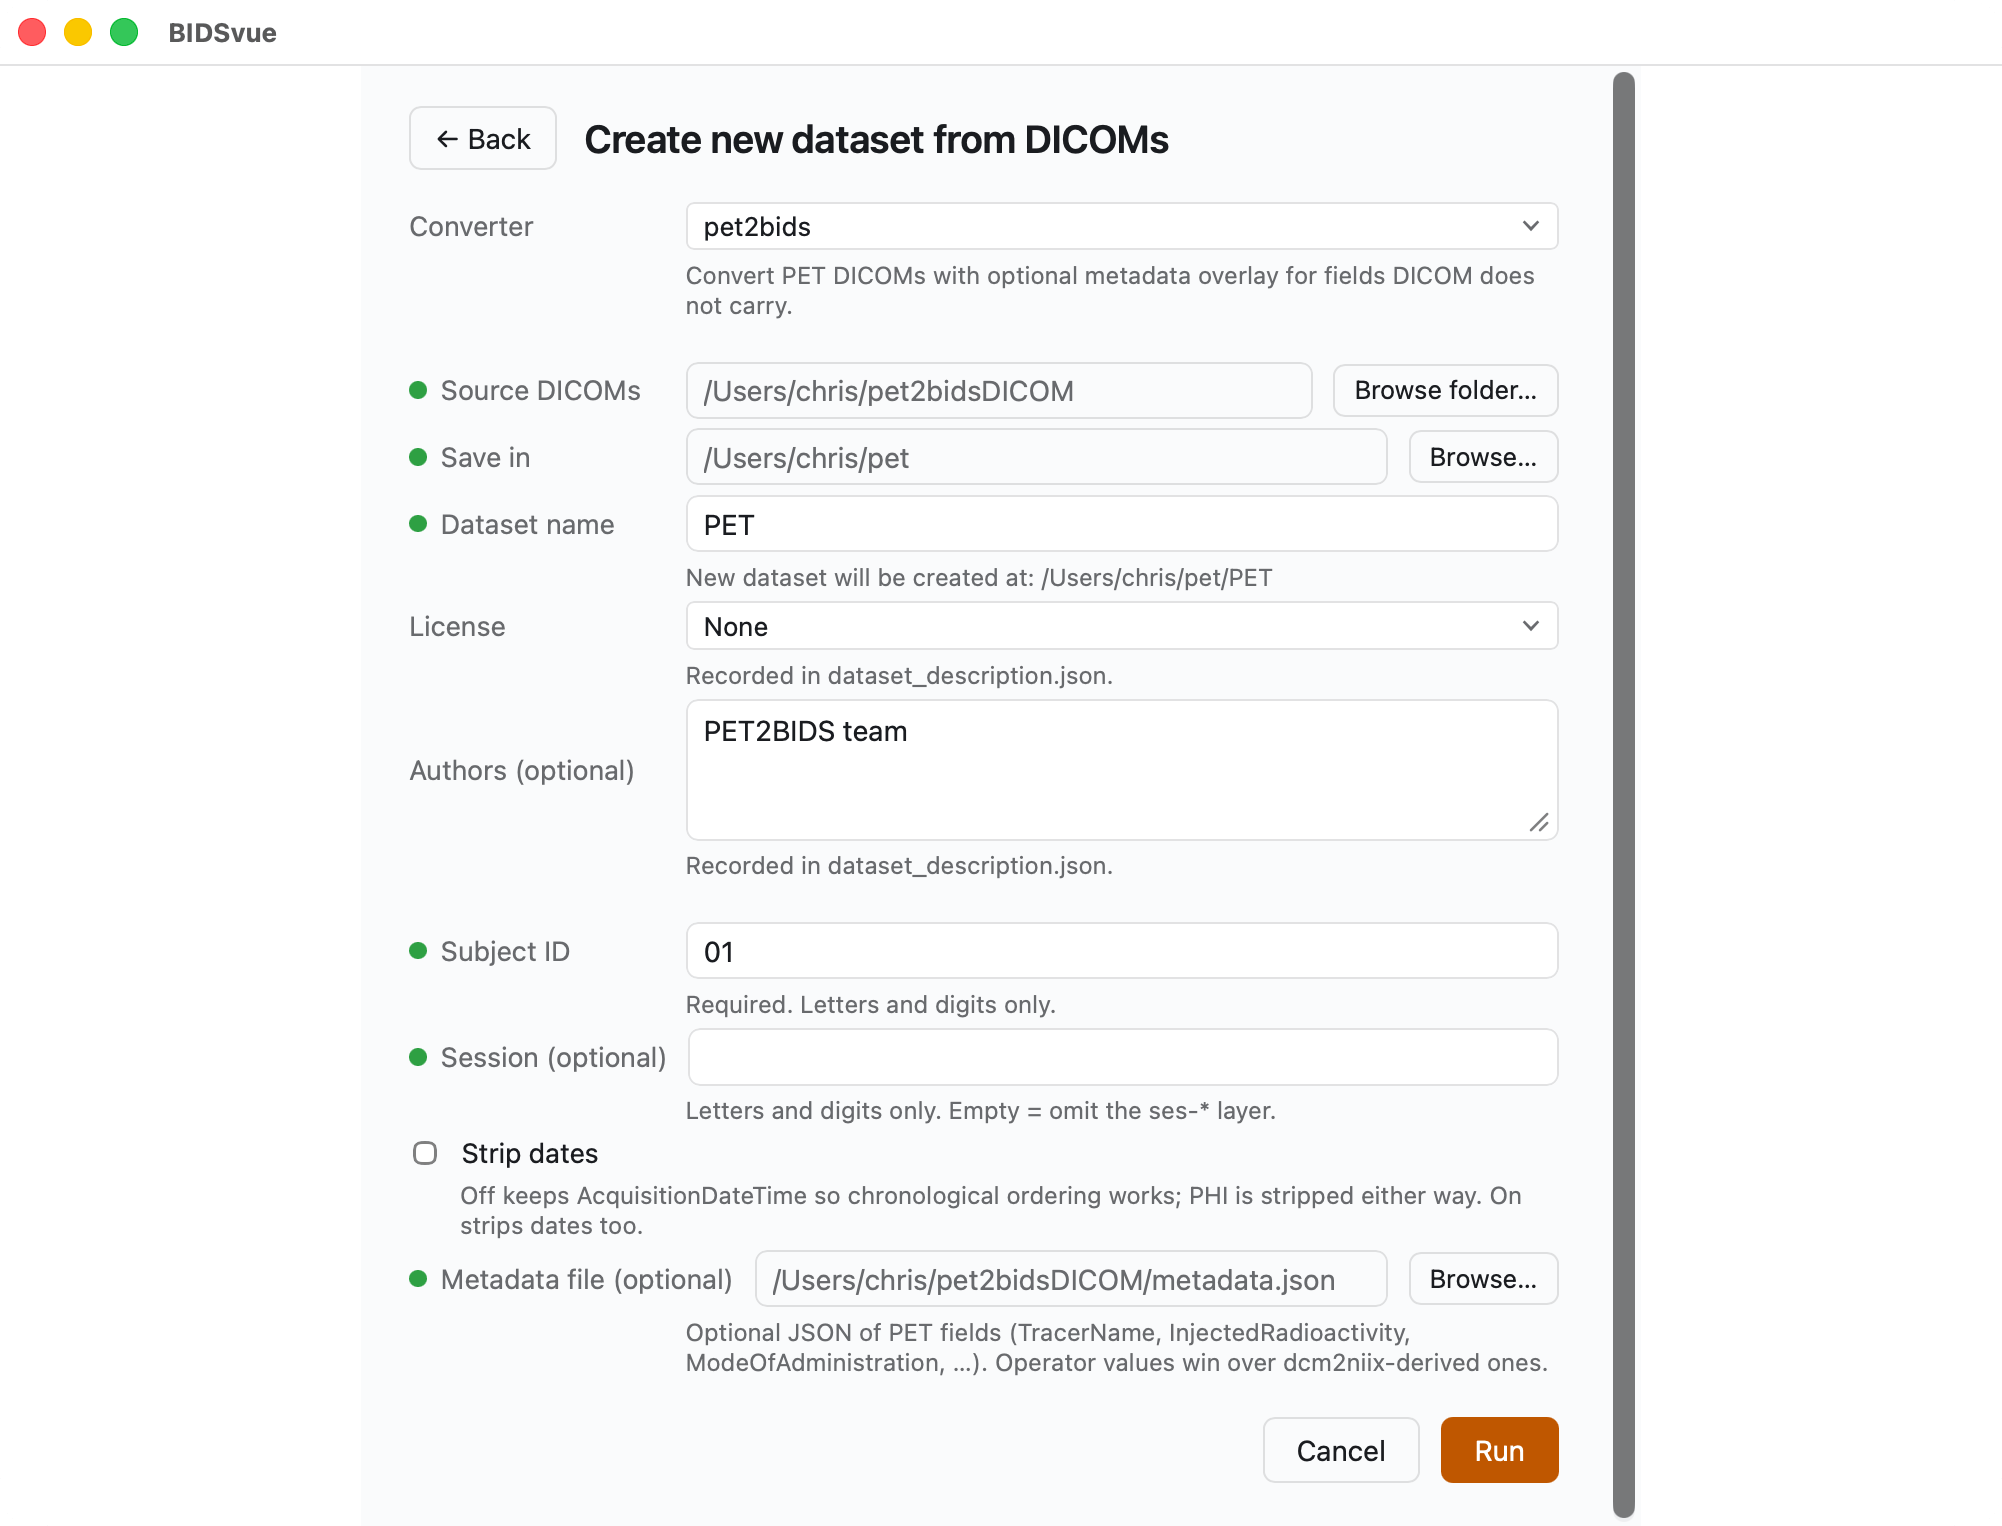
Launch BIDSvue and choose Create new dataset from DICOM, then select the pet2bids converter.
- For Source DICOMs, choose the extracted
pet2bidsDICOMfolder. - For Save in, pick a location with enough space and write permission.
- Fill out every item with a red marker before the Run button becomes enabled.
- Since we have the tracer information, include the provided
metadata.jsonas the (optional) metadata file. - Press Run to create your dataset.
Inspect the dataset
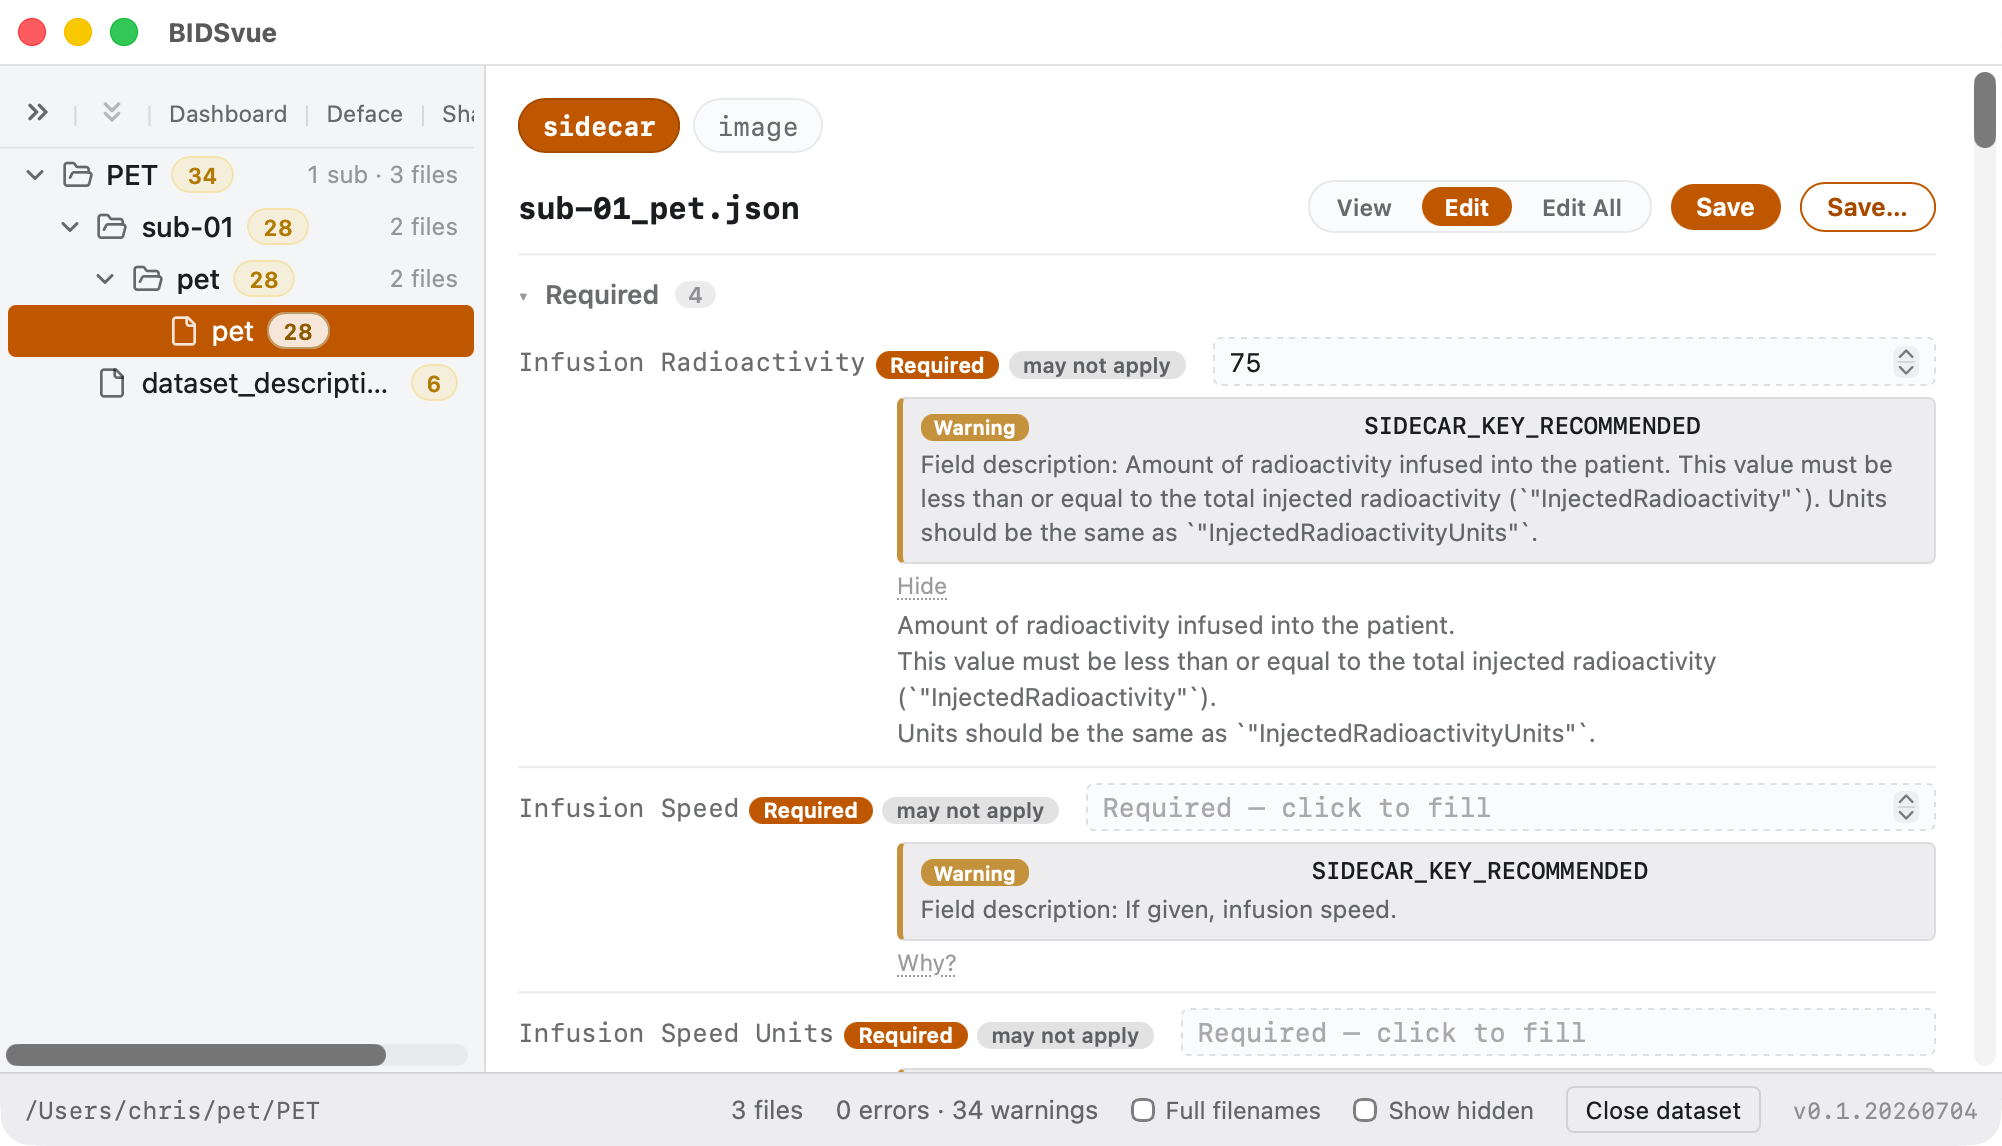
BIDSvue opens into the dataset view. The left tree lists every file; click a node to preview it, and watch the status bar confirm the bids-validator found no errors (though several warnings are reported).
Now check that the scanning details are complete. Select the pet image for subject 01 and open its sidecar. There are three ways to view it:
- View shows every key/value pair in a plain-text editor.
- Edit shows only the items the bids-validator flagged.
- Edit All opens a structured editor for every tag.
Once you make a change, Save updates just this sidecar, or Save… applies it to similar files.
Share your dataset
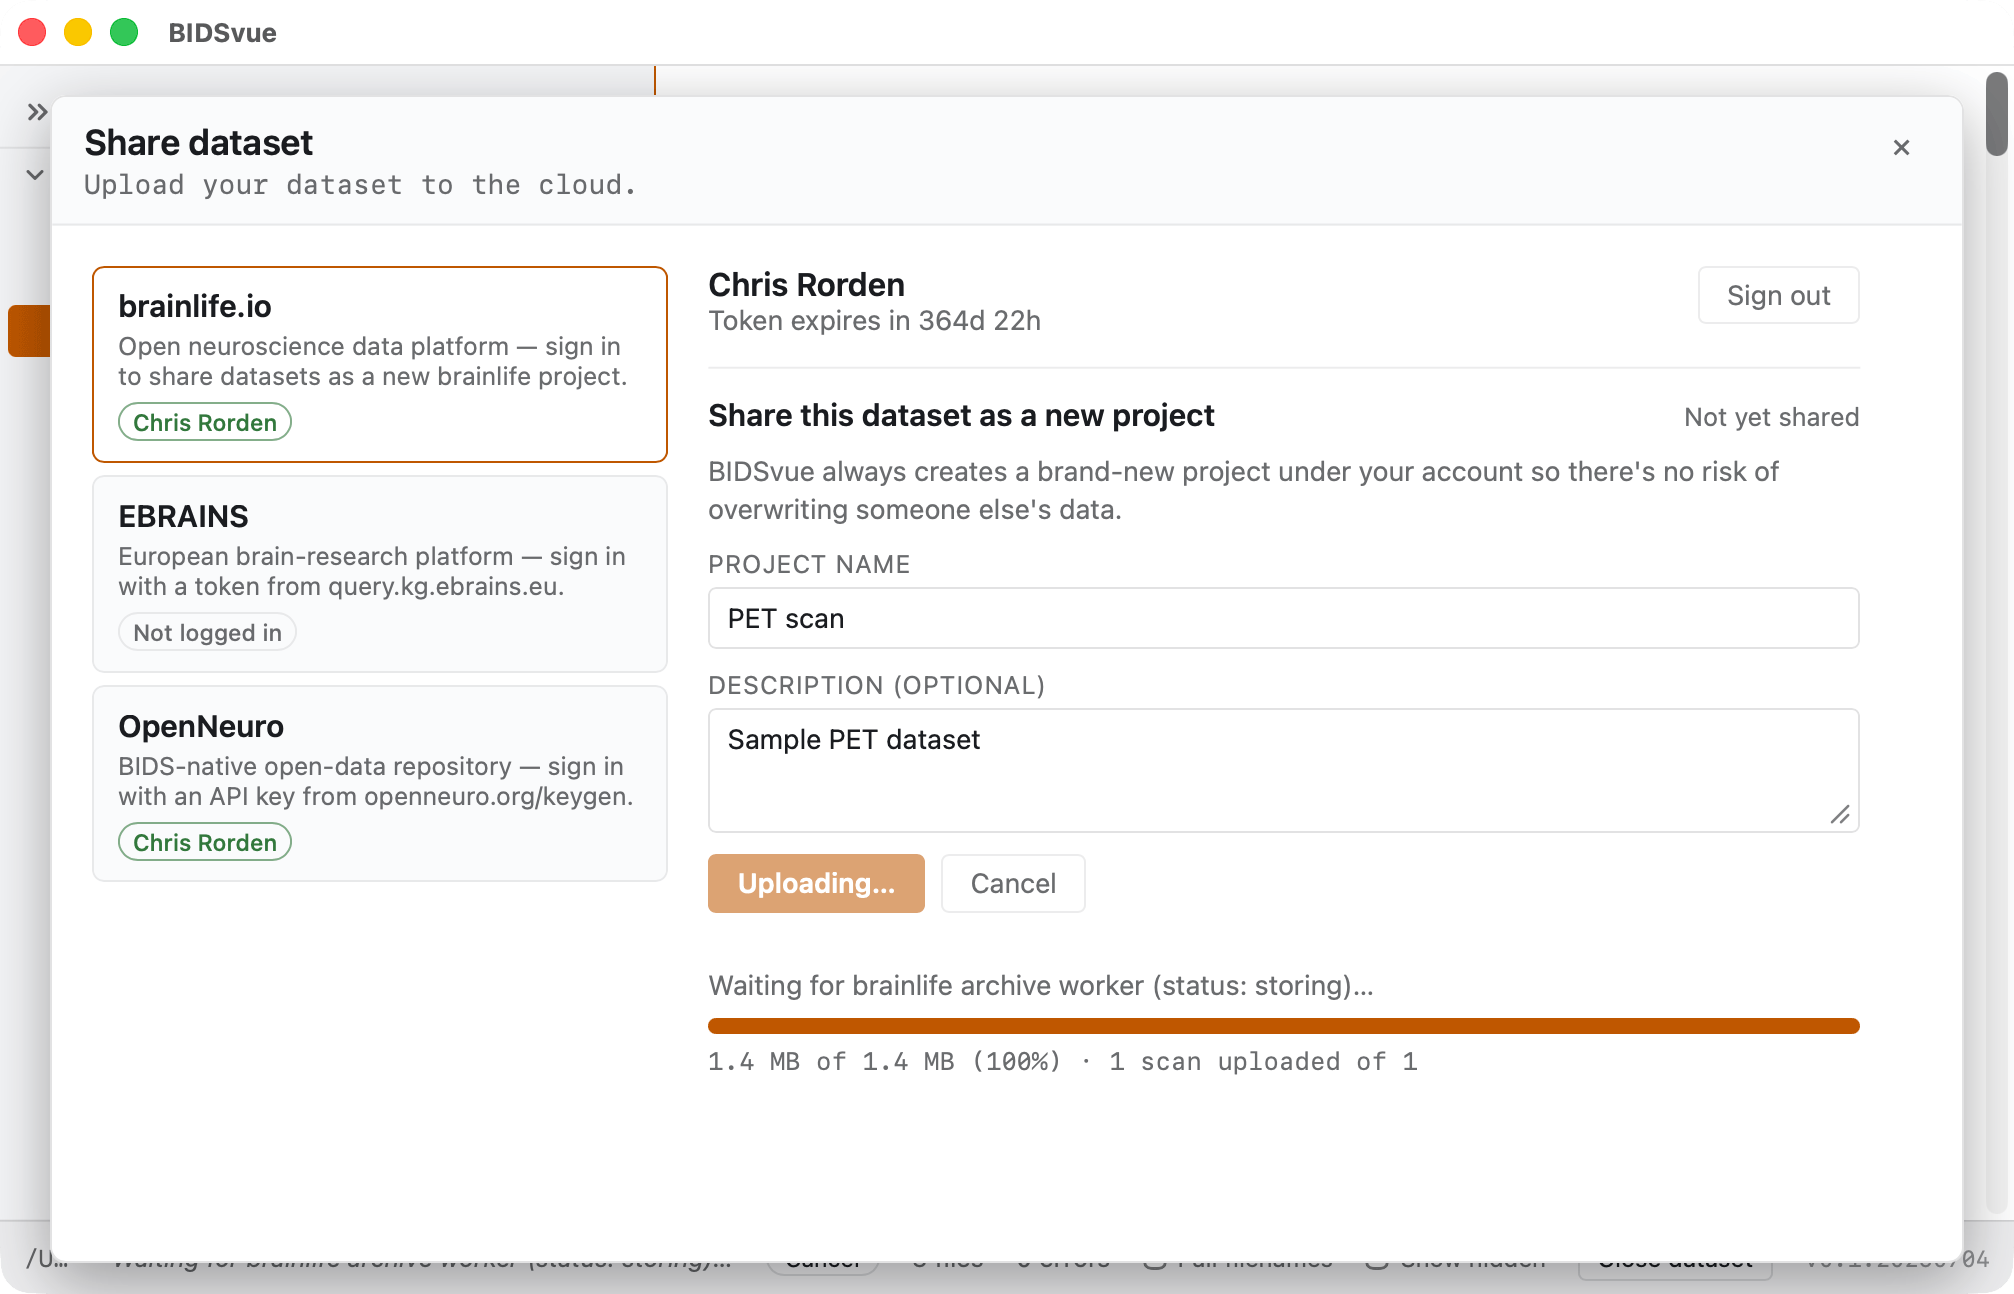
Once you're satisfied the data is anonymized and correctly curated, publish it. Press Share above the tree and pick a provider — here, brainlife.
- The first time you share with a repository, you'll be asked for an access token; the link provided walks you to it, and BIDSvue remembers it for you.
- The provider may ask you to confirm the data is de-identified before the upload begins. You'll then see your files' progress as they upload.