Convert ReproIn MRI to BIDS
This walkthrough takes a folder of ReproIn-named DICOMs and turns it into a validated, de-identified, shareable BIDS dataset — converting the images, checking them against the validator, defacing and renaming to remove identifiable details, correcting the metadata, and finally publishing to a public repository. If you name your scans with the ReproIn convention at acquisition time, BIDSvue can do most of this for you automatically.
Requirements
- Install BIDSvue for Linux, macOS, or Windows.
- Download and extract the sample
reproinXA60adataset (a single subject, single session). - Roughly 15 minutes and a little free disk space.
Create a new dataset from DICOM
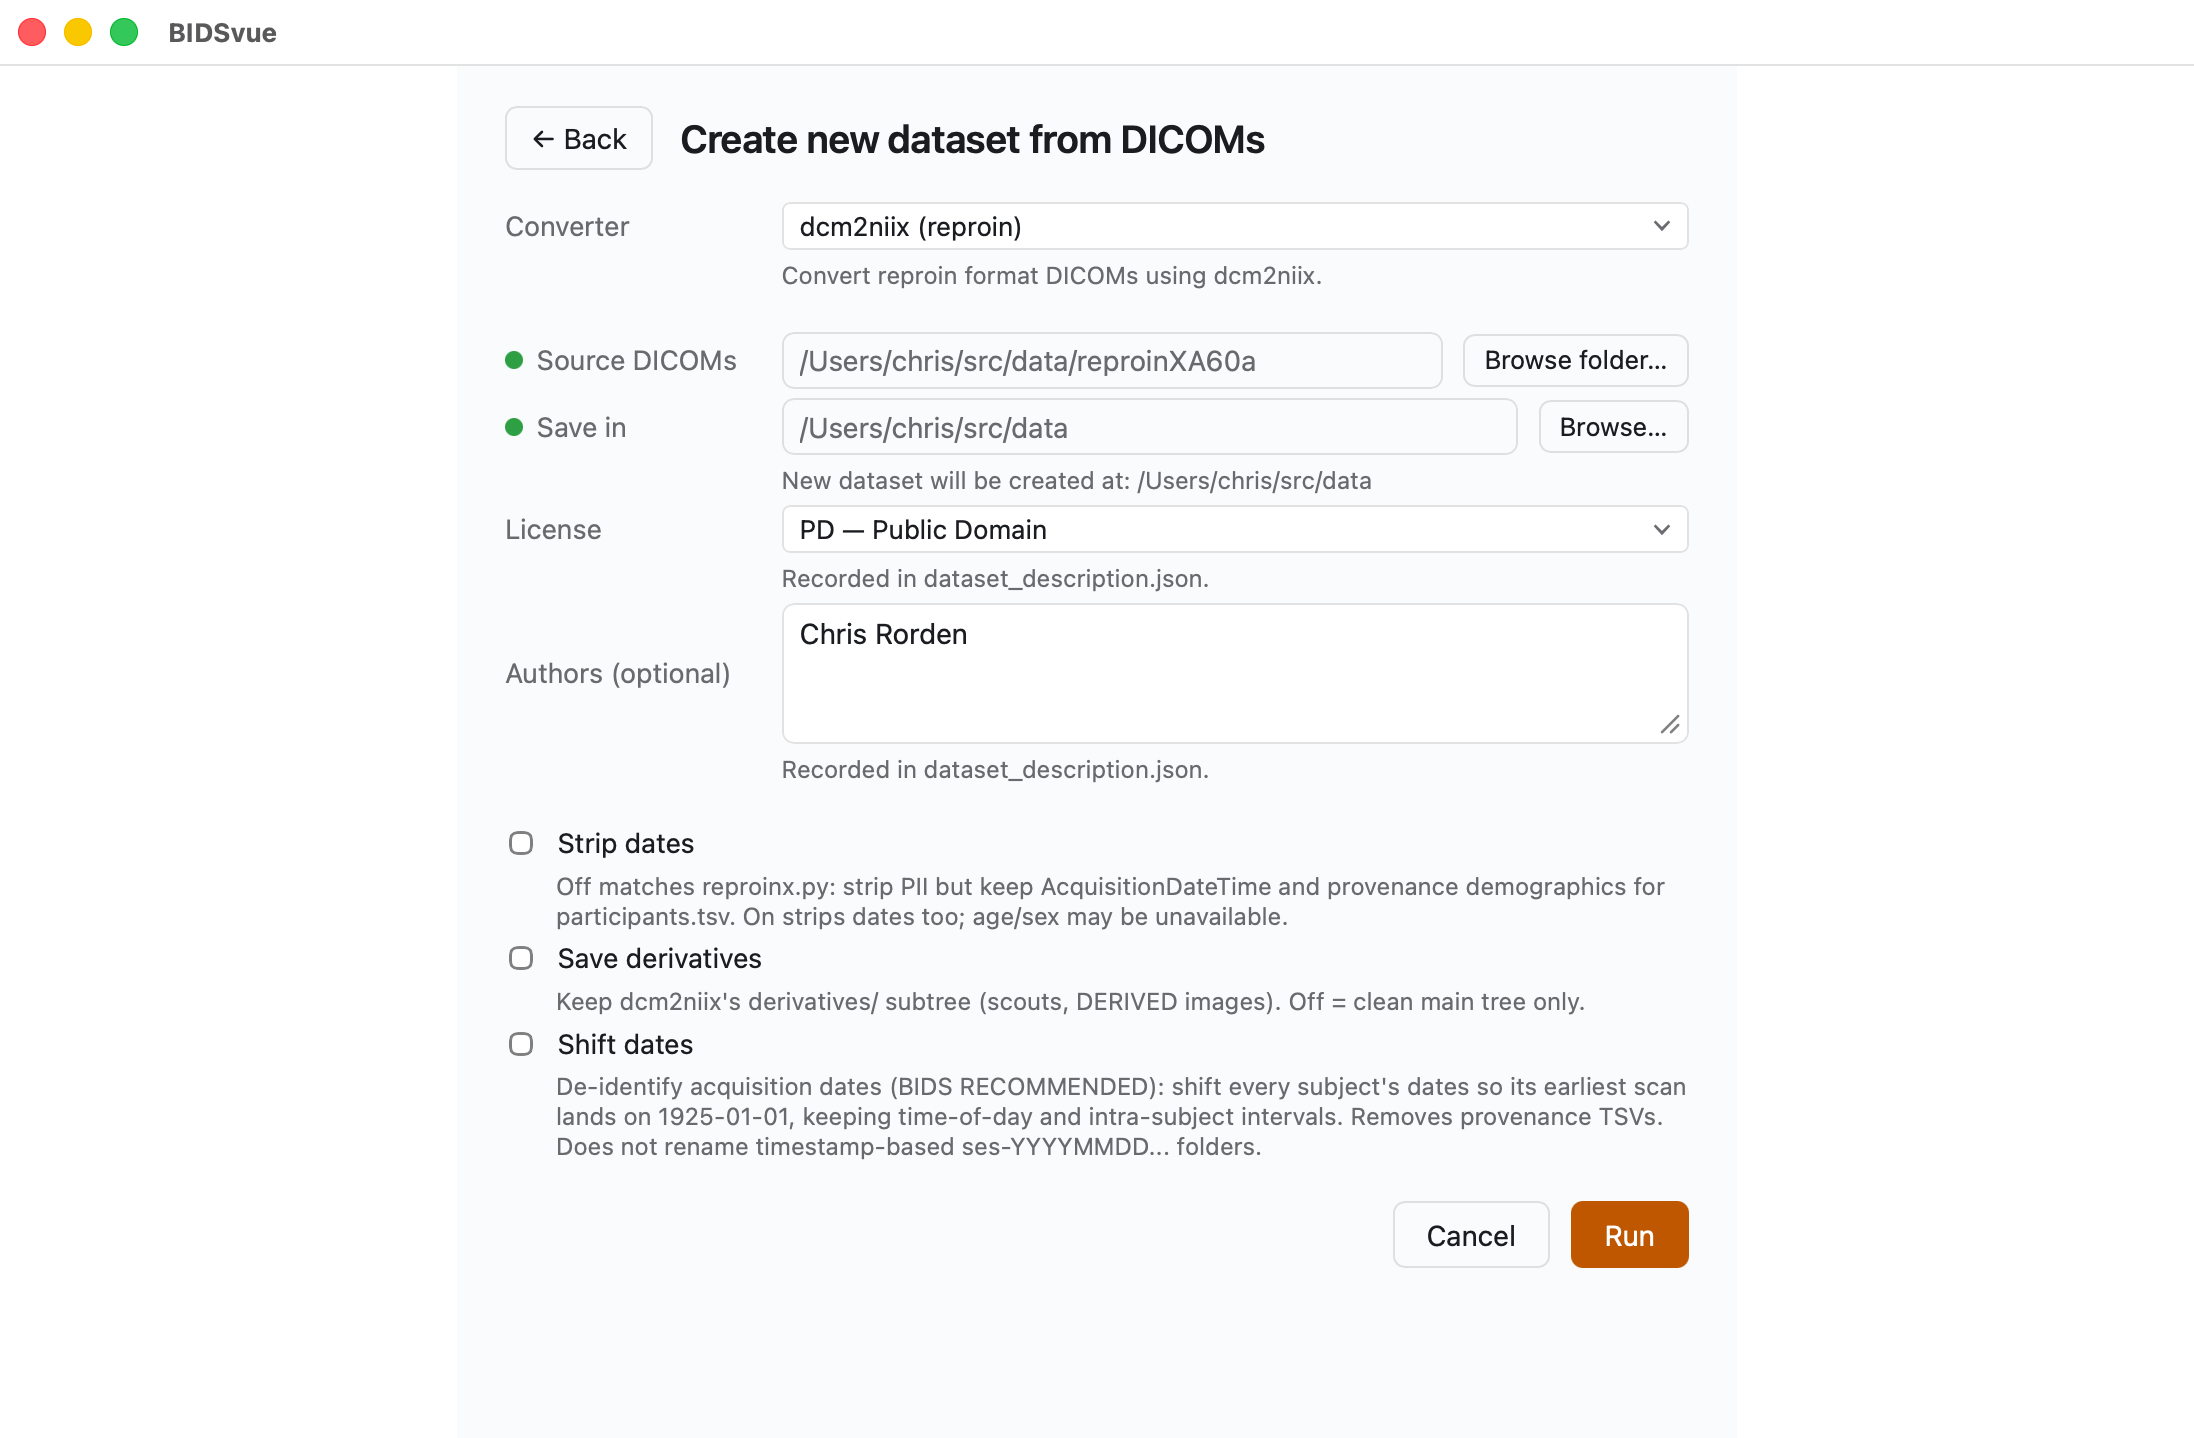
Launch BIDSvue and choose Create new dataset from DICOM, then select the dcm2niix (reproin) converter.
- For Source DICOMs, choose the extracted
reproinXA60afolder. - For Save in, pick a location with enough space and write permission.
- Once both are set the Run button lights up. Leave the de-identification options at their defaults for now and press Run.
Inspect and de-identify the images
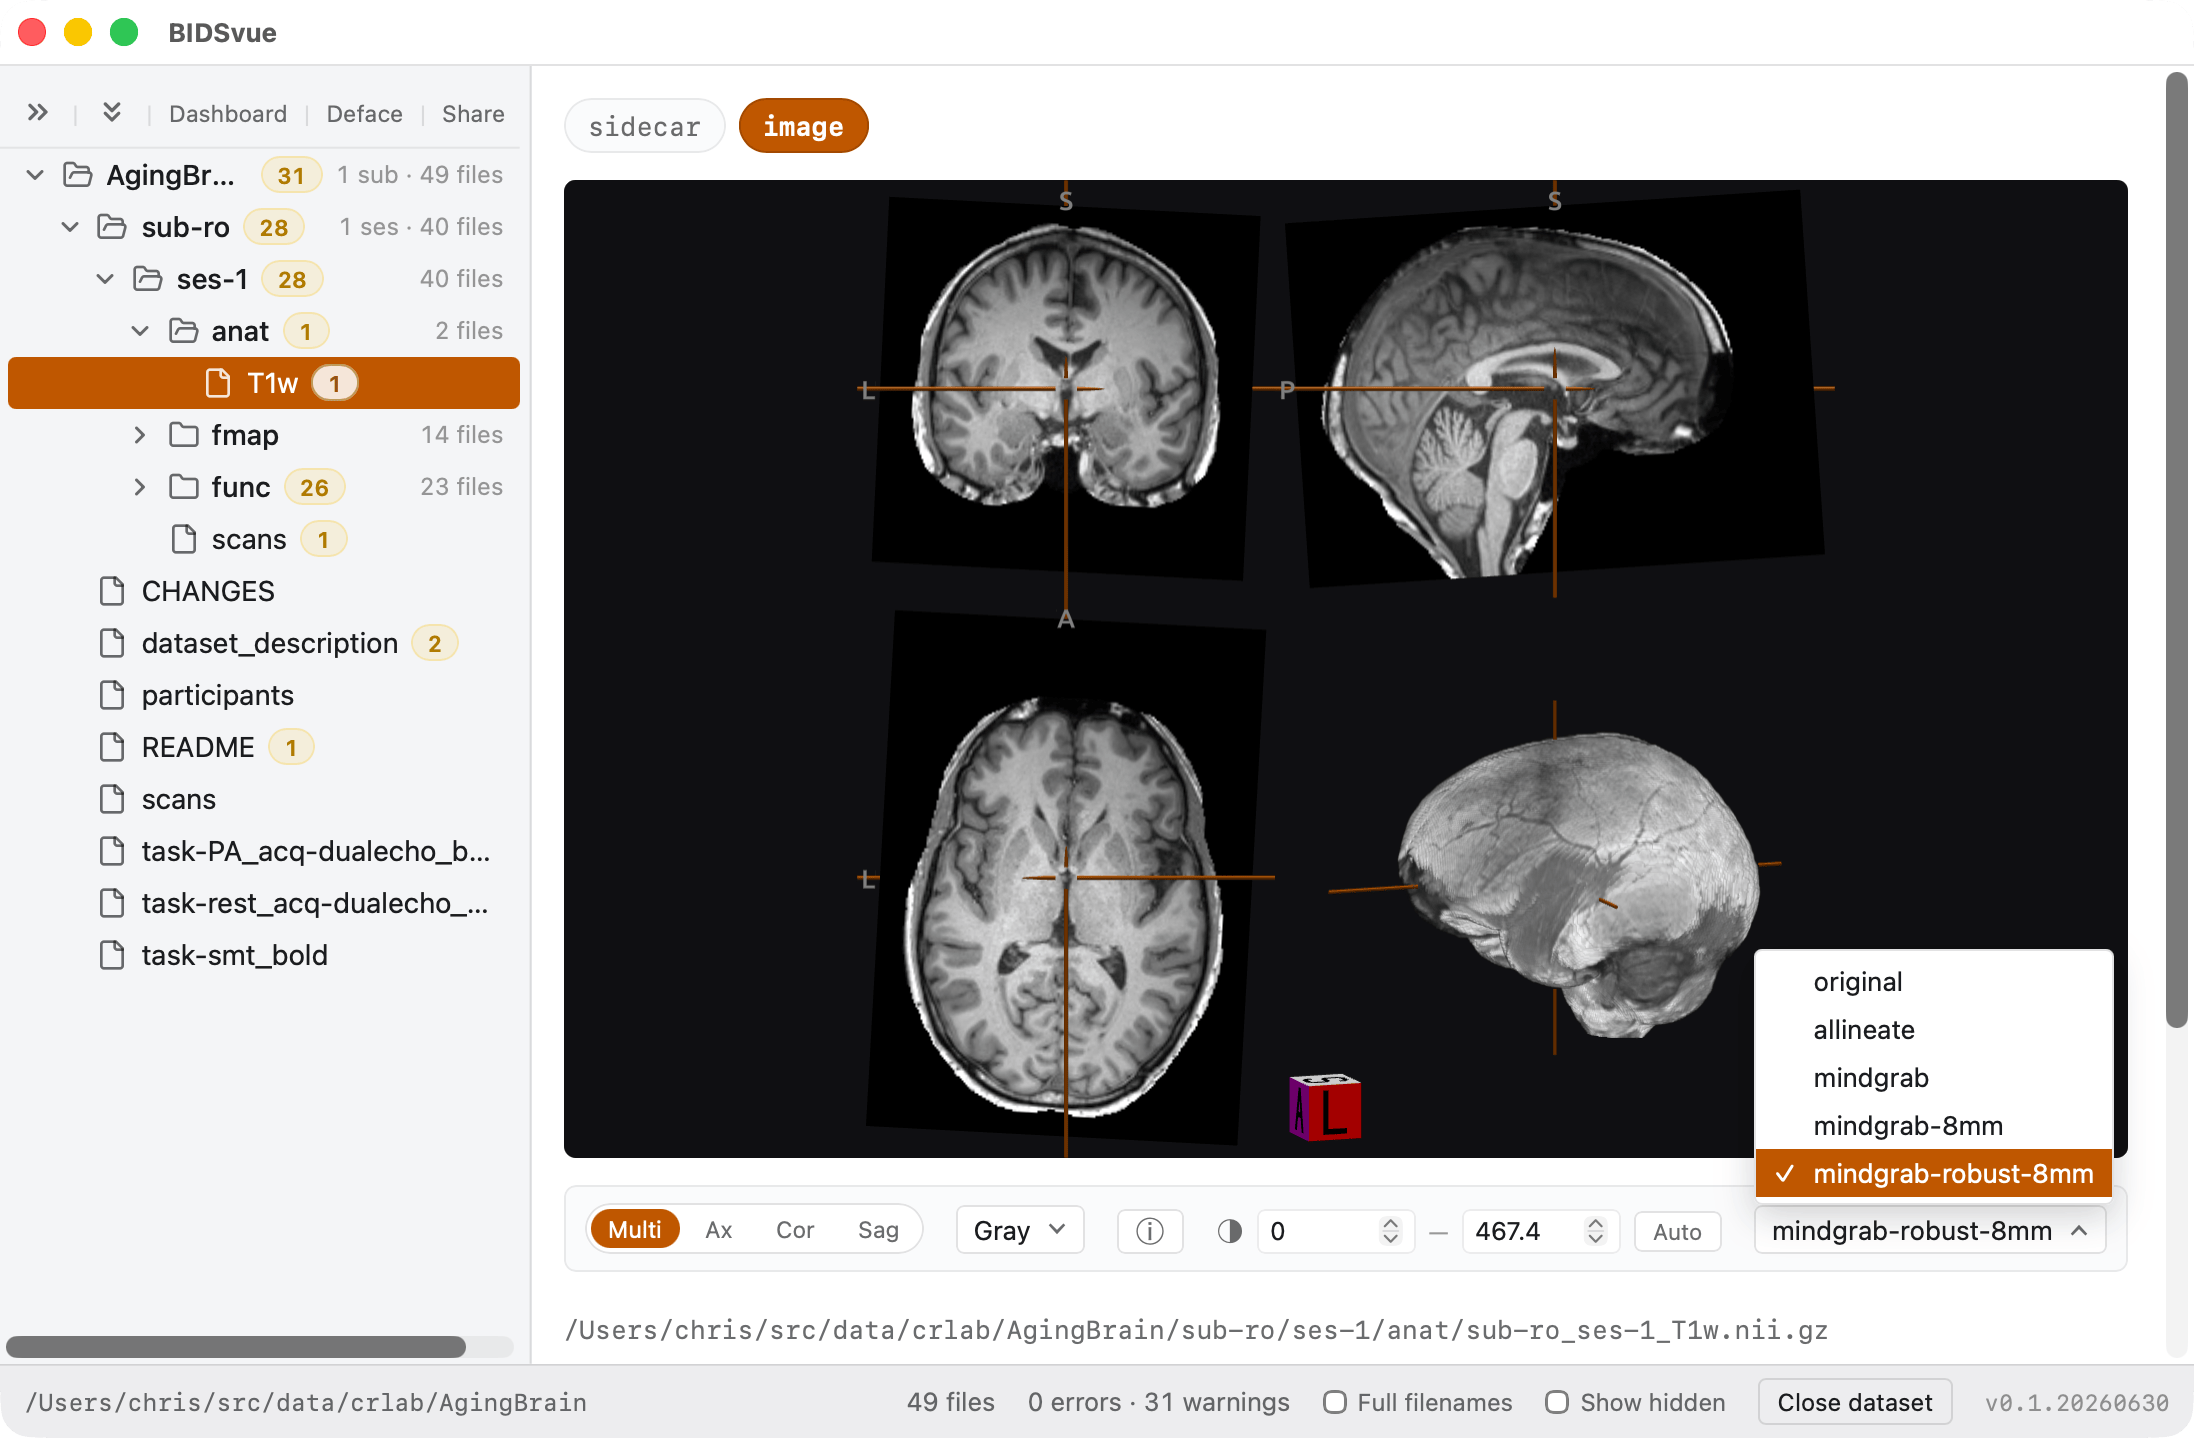
BIDSvue opens straight into the dataset view. The left tree lists every file; click a node to preview it, and watch the status bar confirm the bids-validator found no errors.
This is the moment to make sure nothing identifiable survives. Select the T1w image for subject ro, session 1, switch from sidecar to image, and choose a defacing method — here, mindgrab-robust-8mm — to strip facial features from the anatomical scan.
Rename subjects and sessions
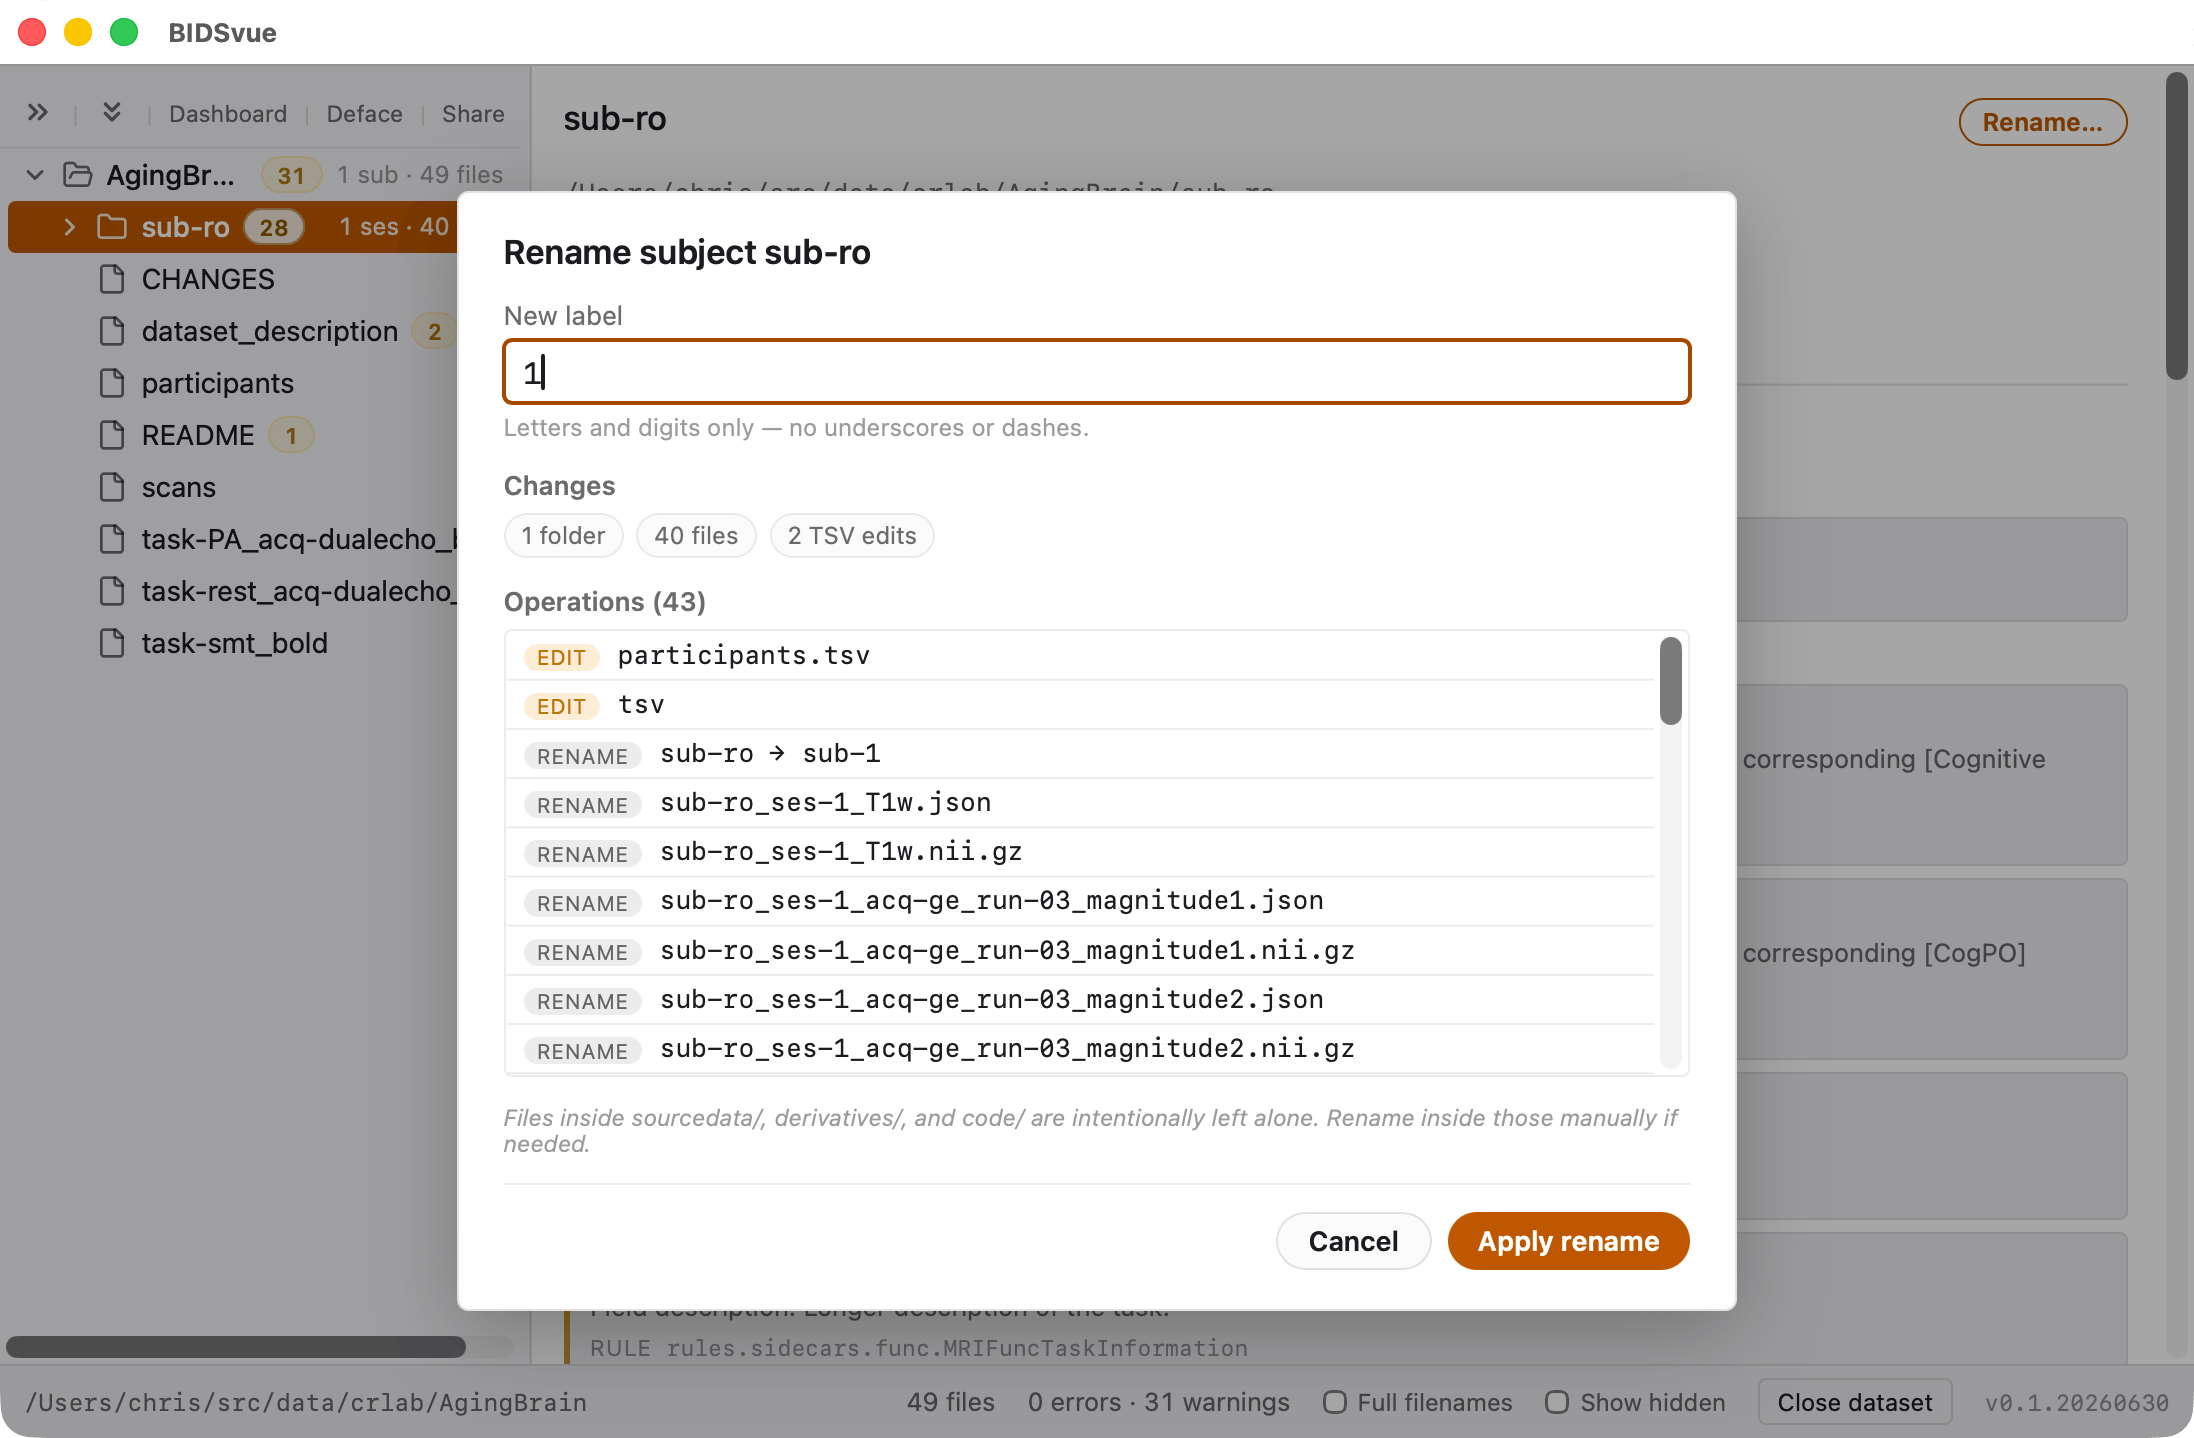
Personal details sometimes leak into subject or session labels — a name, a scan date. Right-click the sub-ro node, choose Rename subject sub-ro, and set the new label to 1. BIDSvue rewrites all 40 files to match the BIDS specification; press Apply rename to commit the change.
Edit the JSON sidecars
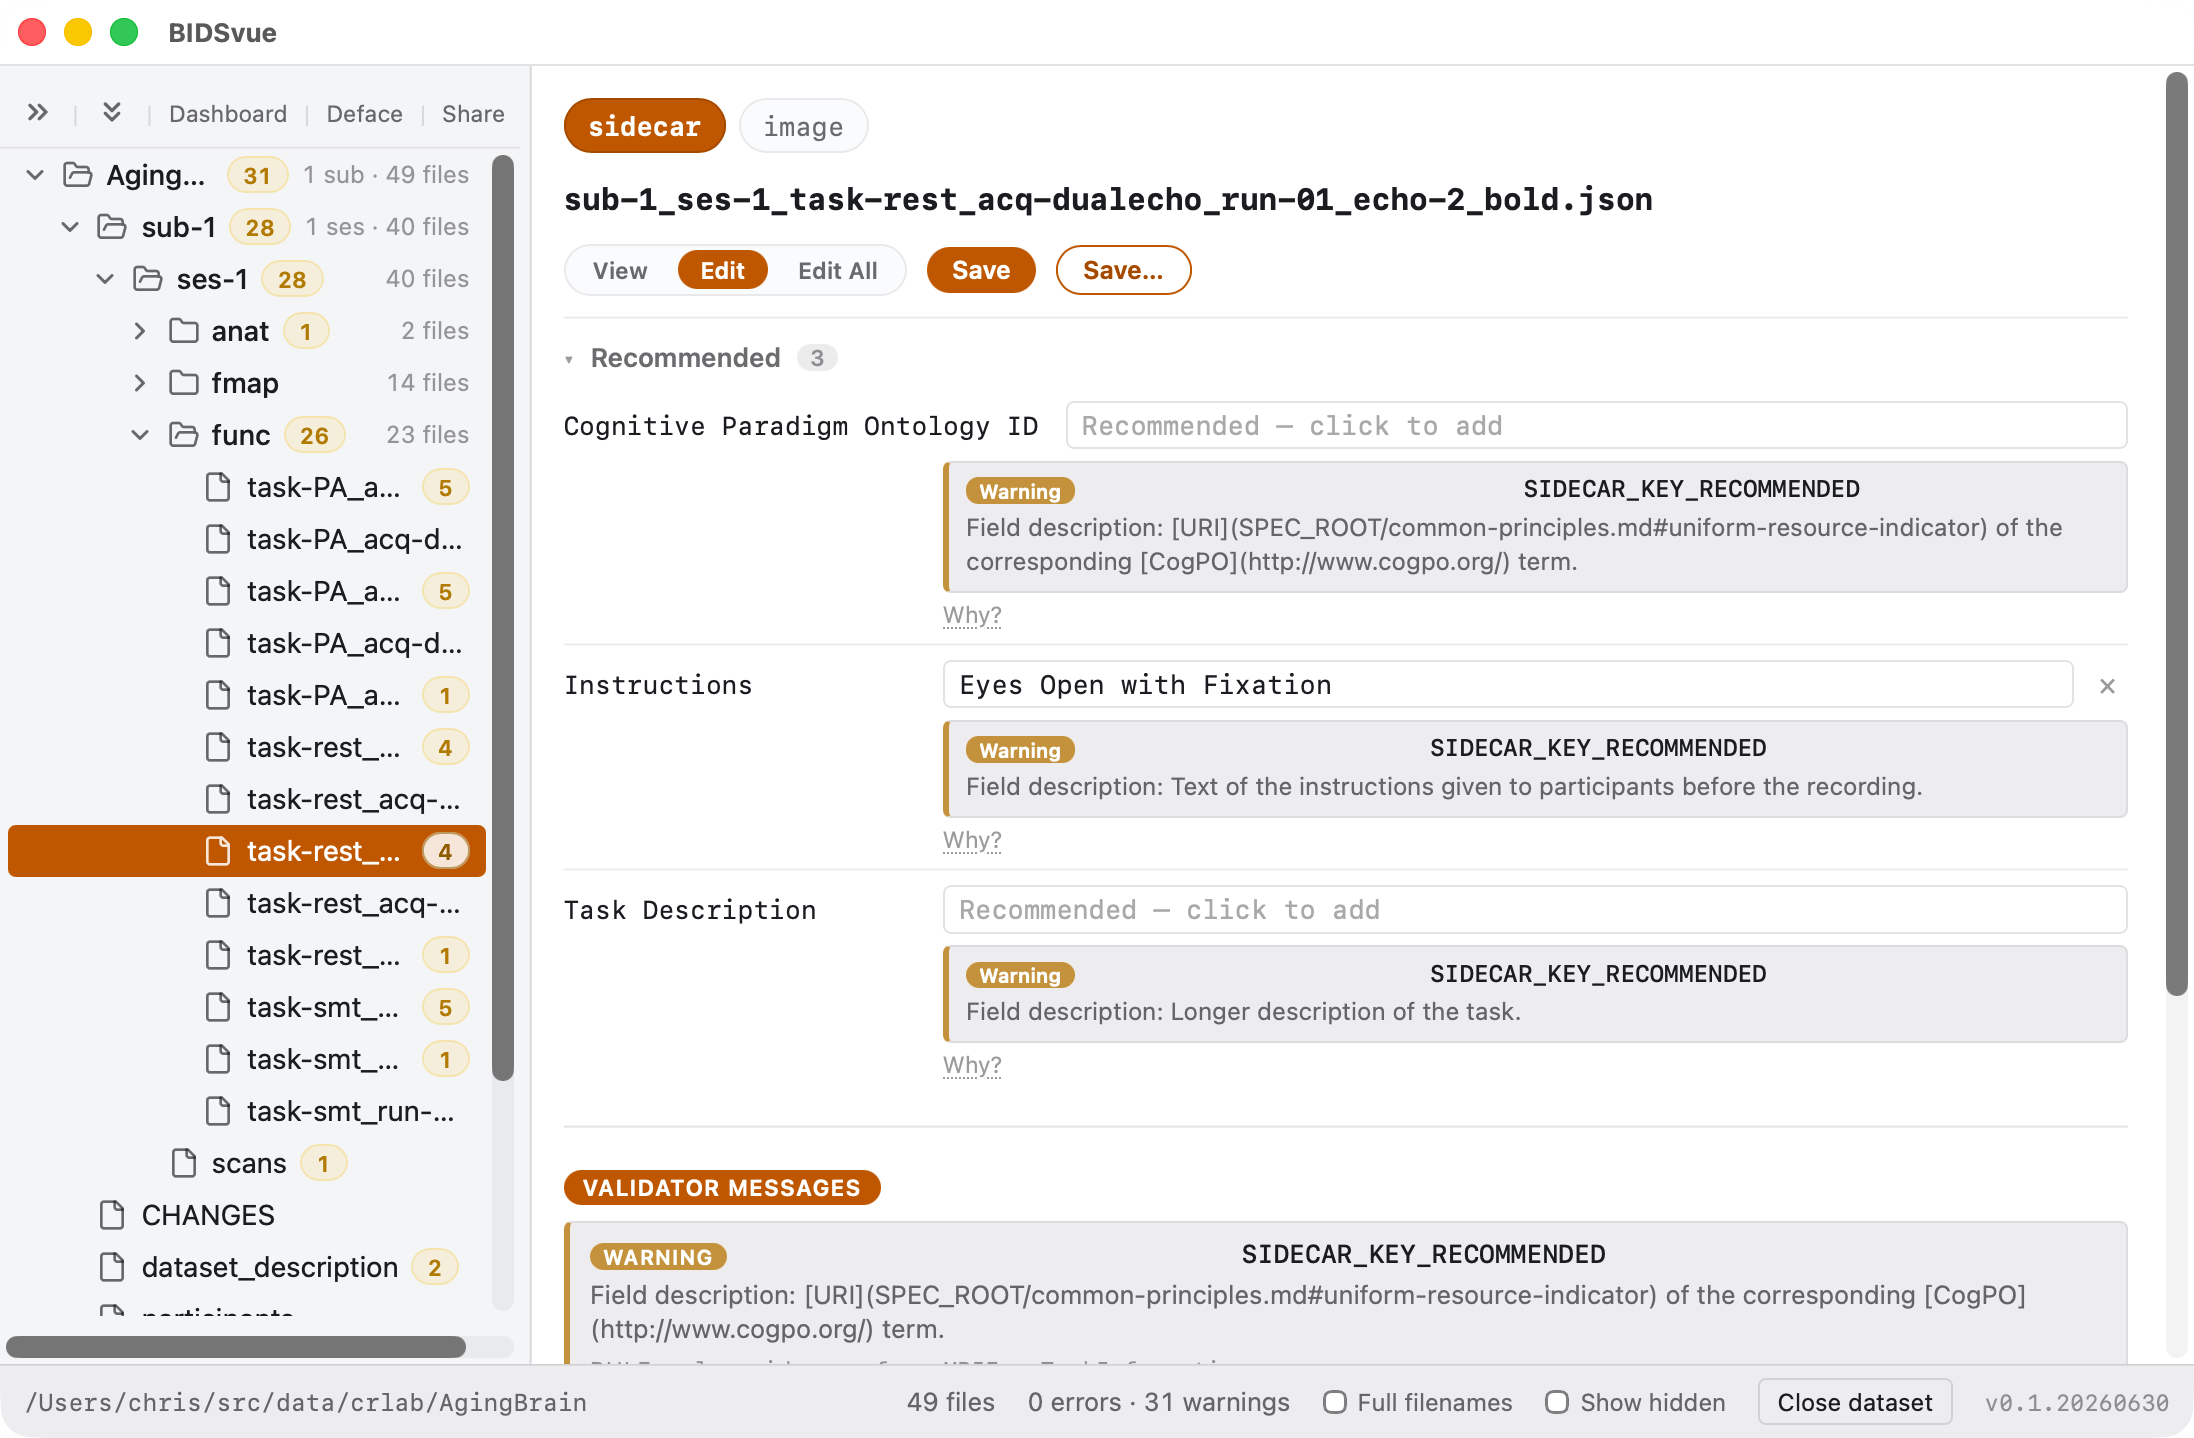
Select the task-rest_acq-dualecho_run-01_echo-2_bold item and open the sidecar's Edit view. By default it shows only the fields the validator flagged (Edit all reveals every key/value pair). Change Instructions to read Eyes Open with Fixation.
- Save updates just this sidecar.
- Save… lets you apply the same change to related files.
Apply a change across many files
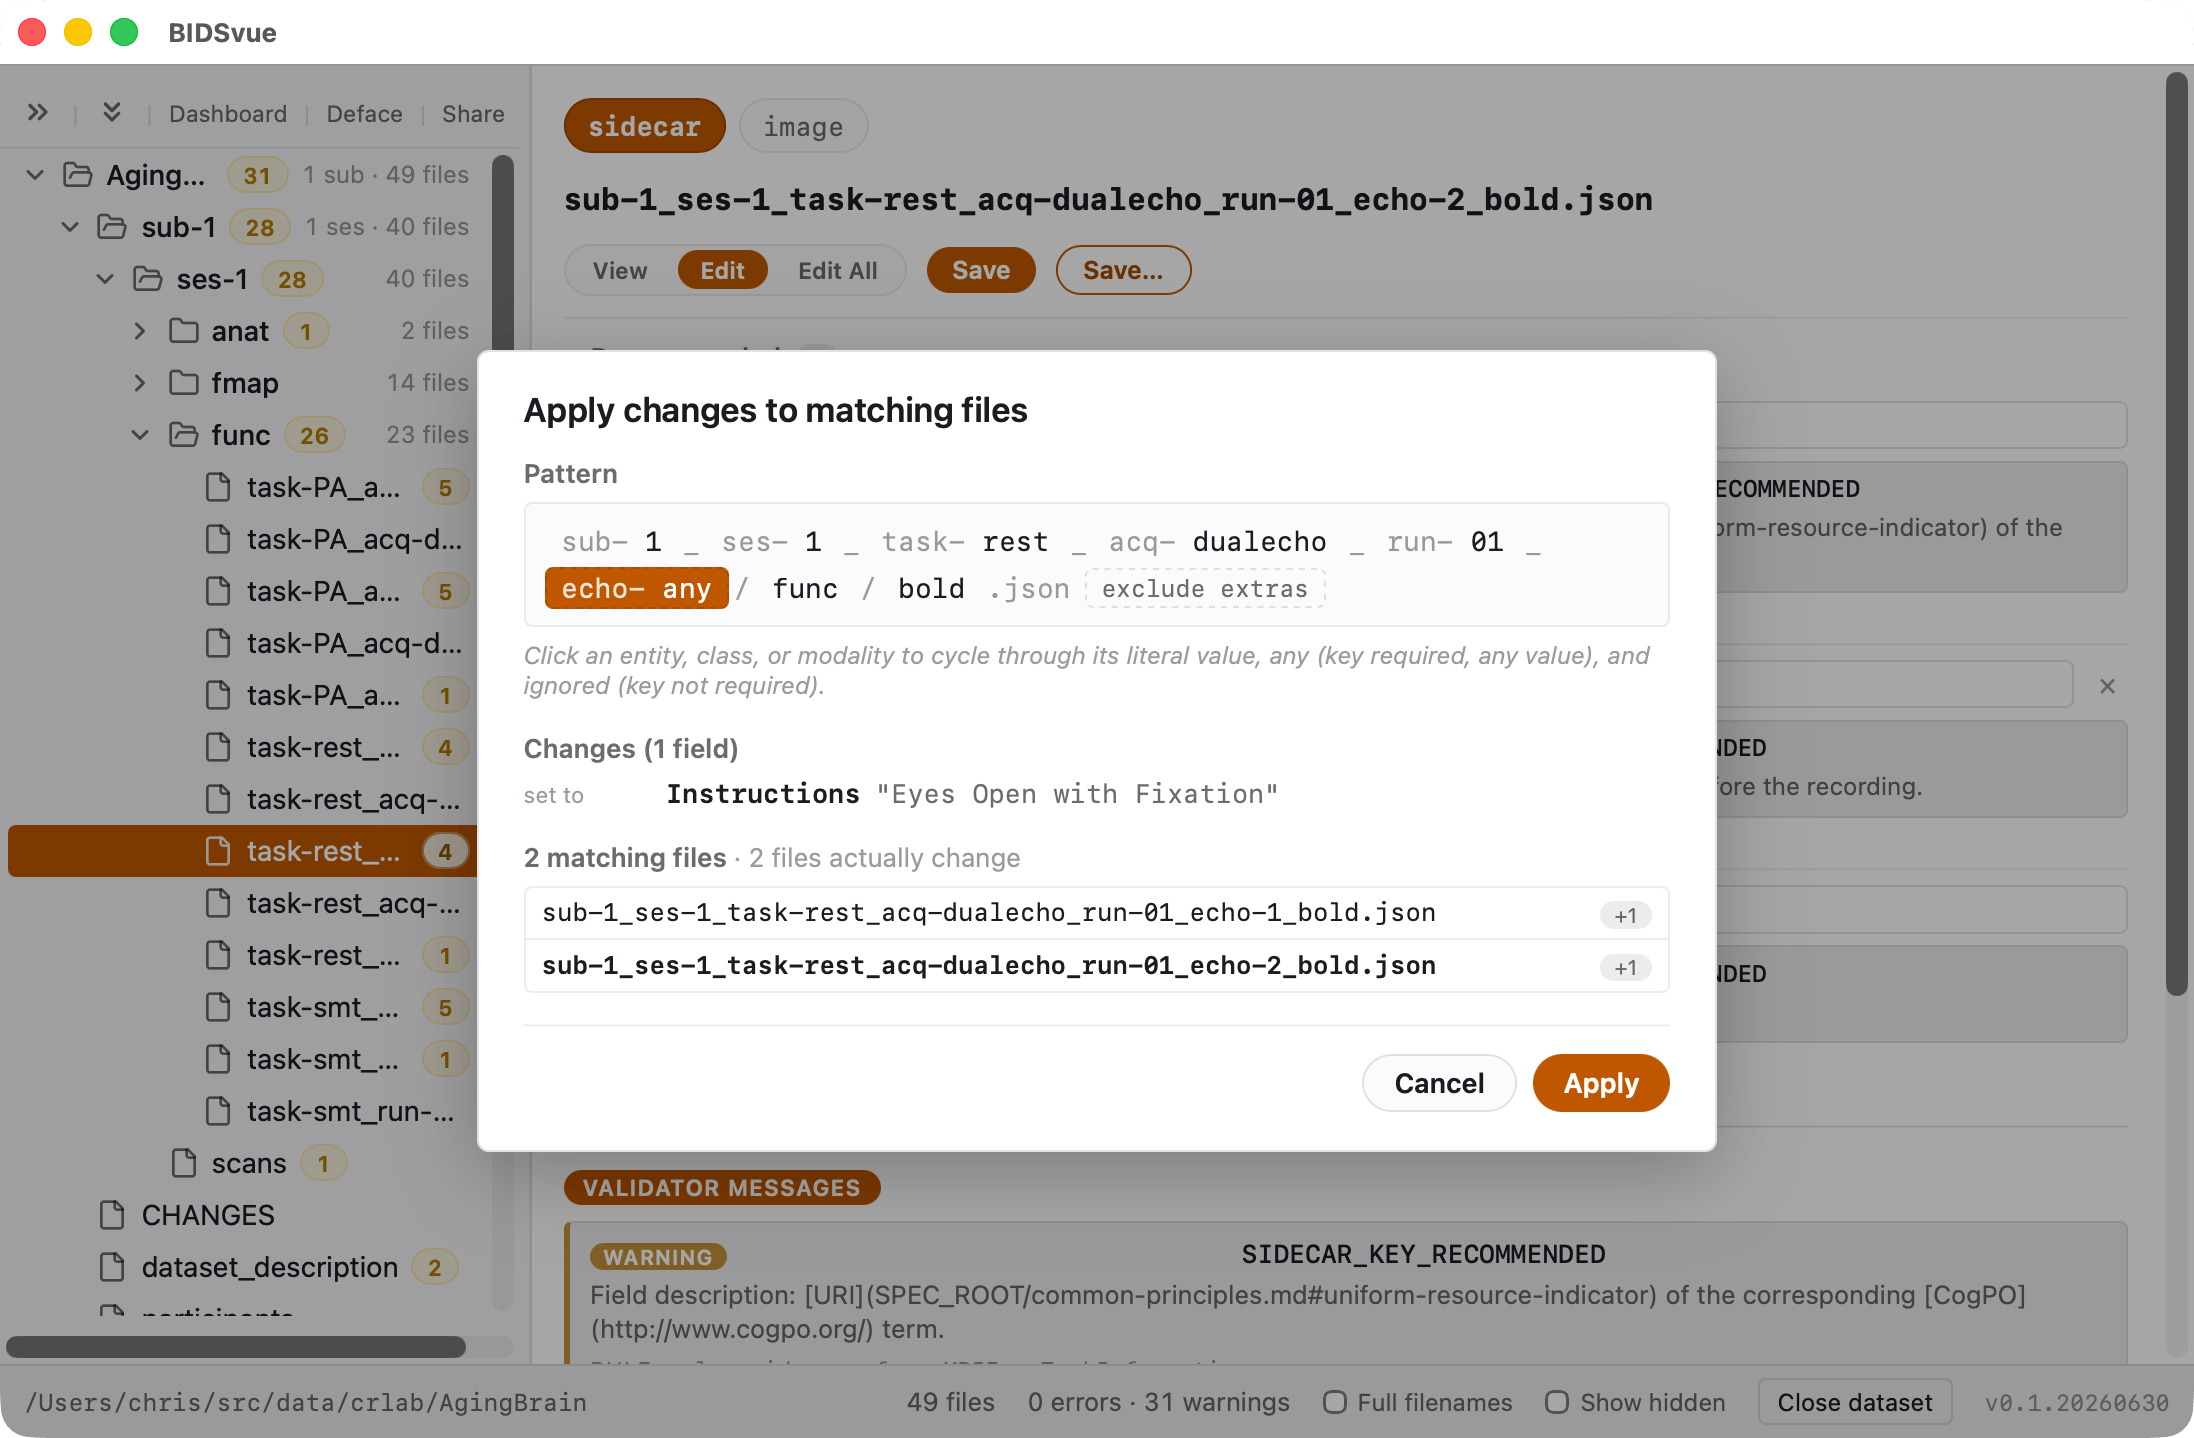
Choose Save… and BIDSvue shows the filename broken into its BIDS components. Click the parts you want to match to select exactly which files should receive the edit — one correction, propagated everywhere it belongs.
While you're here, explore the rest of the tree: you can edit sidecars, tabular files like participants.tsv, and plain-text files like the README the same way.
Share your dataset
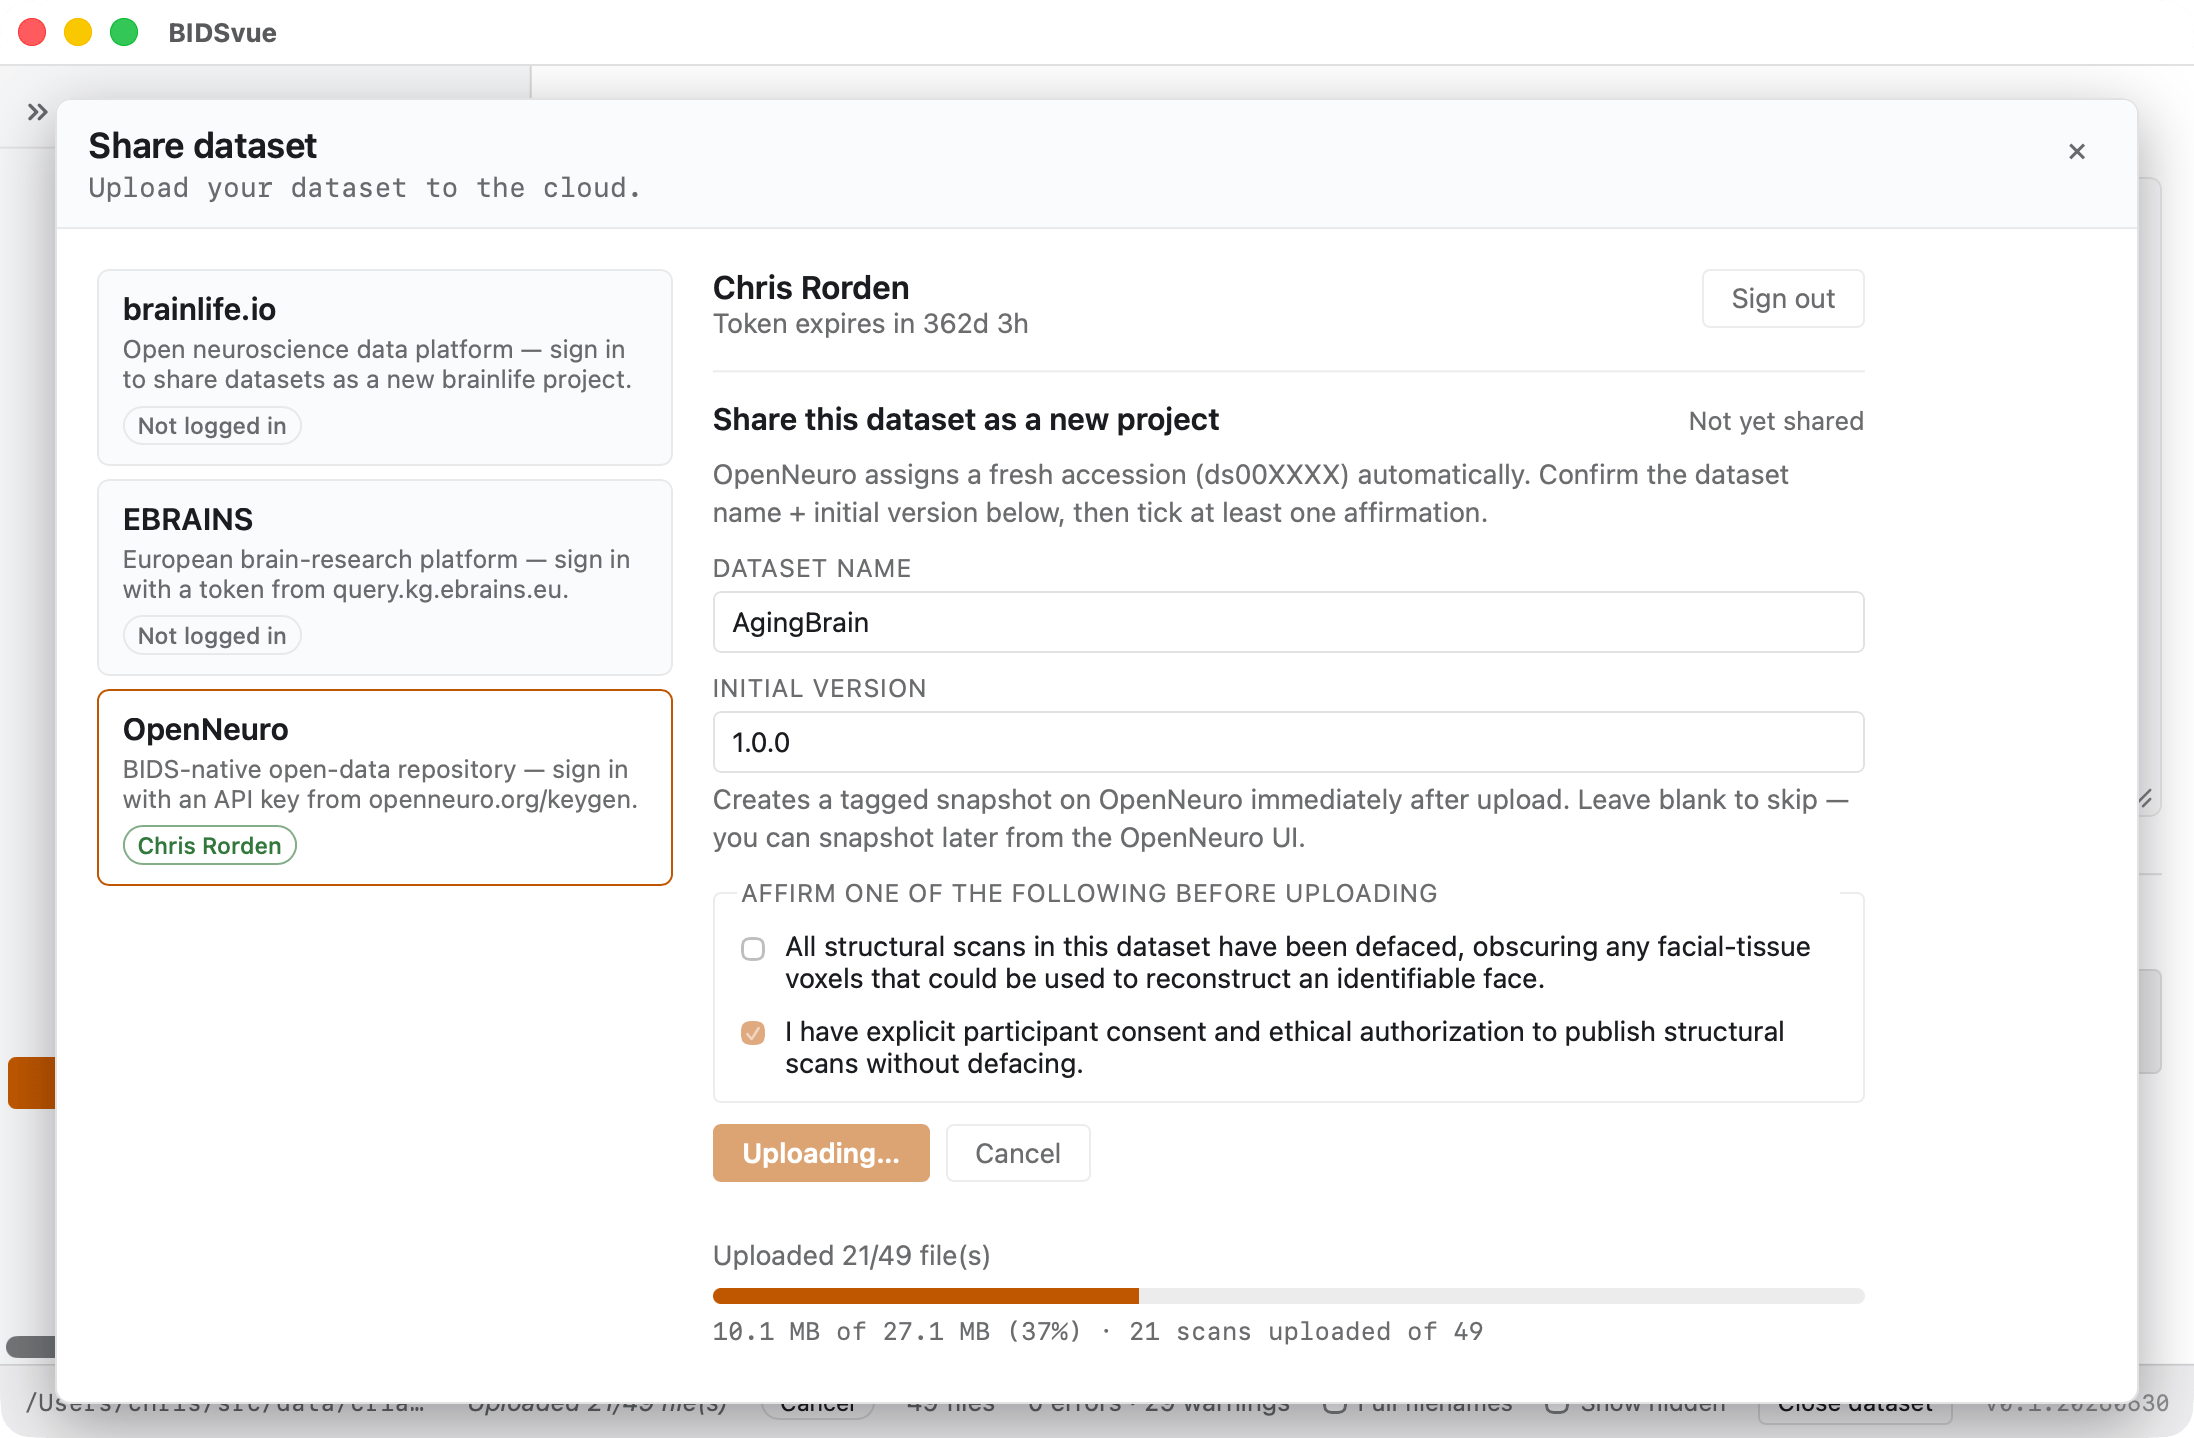
Once you're satisfied the data is anonymized and correctly curated, publish it. Press Share above the tree and pick a provider — here, OpenNeuro.
- The first time you share with a repository, you'll be asked for an access token; the link provided walks you to it, and BIDSvue remembers it for you.
- The provider may ask you to confirm the data is de-identified before the upload begins. You'll then see your files' progress as they upload.